Category Archives: Uncategorized

Liz’s Luscious Raspberries

This time of year, The River Cottage Preserves Handbook is my constant companion. June was all about strawberry jam. July is about raspberries. Sadly, the weather has been so unusual that the raspberry harvest isn’t quite what I’d expected. We had a warm winter and early spring, followed by a few unexpected frosts, a stretch of glorious weather, and now a heat wave.

Today I picked only about a pound of raspberries–not enough for jam, but plenty to make Liz’s Luscious Raspberries. The recipe couldn’t be simpler. It makes two pint-size jars.

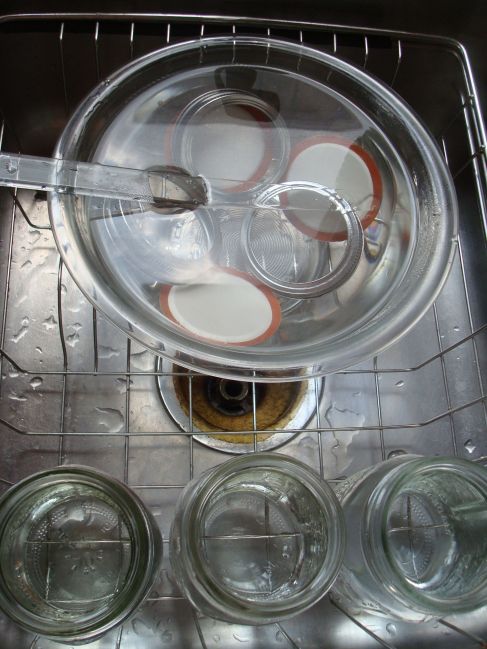
Start by preparing your jars. I wash mine, then fill them with boiling water to keep them hot and sterile until they are ready to fill. I also fill a bowl with the lids, rings, wide-mouth funnel, and that little plastic push-stick thing, then fill to the top with boiling water.

Image

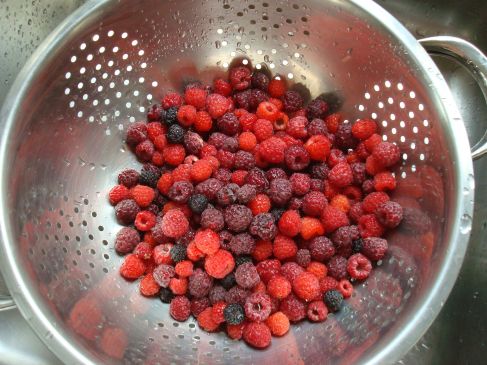
Next, wash the berries very gently and drain thoroughly. I check them over to make sure they are clean and that there are no random hard bits in the berries.

Image

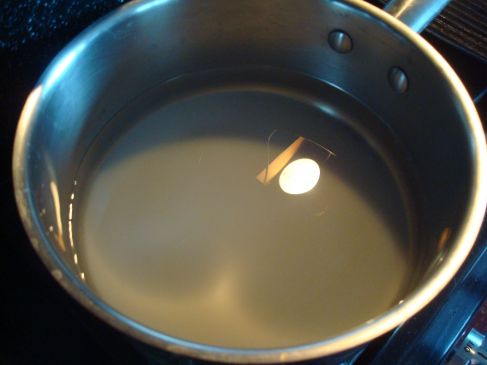
Next make a simple syrup. The recipe calls for 3/4 sugar and 3-1/4 cups of water, but I only needed about half of that. Stir over medium heat until the sugar is dissolved, bring to a boil, then remove from the heat. It will stay hot long enough on its own.

Image

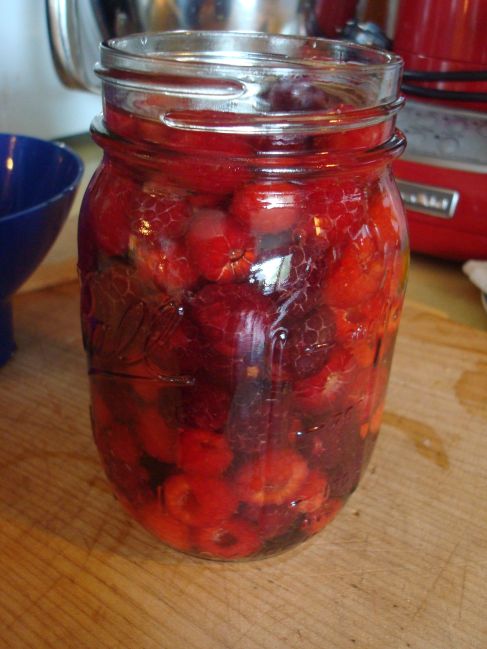
Fill your jars with the berries. I use the plastic push-stick thing to make sure the jars are well filled, but that the berries aren’t so tightly packed that they’re squished.

Pour about 1/4 cup of brandy into each jar of berries. The recipe says you can use gin, vodka, or a raspberry liqueur, but we had brandy on hand from last year’s Christmas cake.

Then fill each jar to within 1/2 inch with the simple syrup.

Image

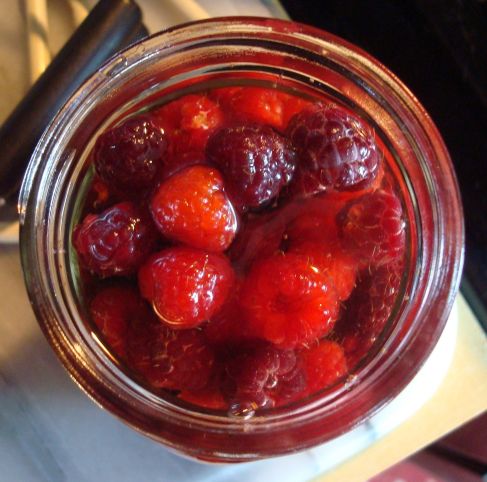
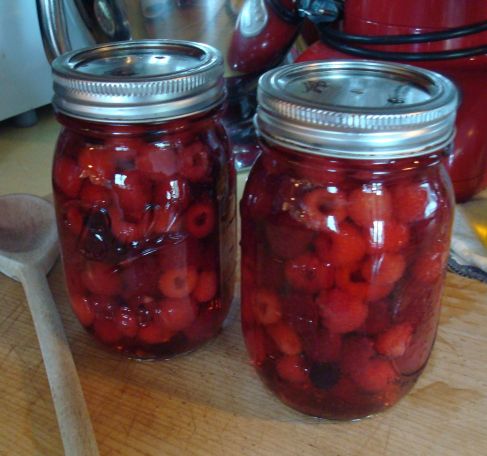
Don’t they look gorgeous?

Image

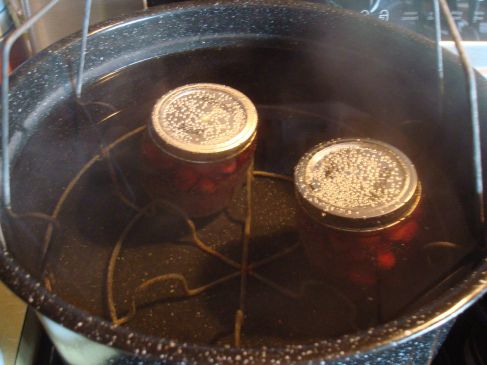
Put the lids on the jar and screw the rings on, leaving the rings a little loose to allow steam to escape. then put the jars in a water bath. The water should start off warm (about 100 degrees Fahrenheit), then let them process until the temperature reaches 190 degrees. Process for 2 minutes at 190 degrees.

Image

And here they are, two lovely pints of luscious raspberries. I’m planning to spoon these over French vanilla ice cream.

Image


Red currant jelly

When I was a little girl, my favorite Christmas cookies were jelly diagonals, made with red currant jelly. My mother made them only once a year, and I always associated the fantastic flavor of red currants with the holidays.

In 2009, I planted a red currant bush in my garden. That year, I had enough red currants to make about 2 tablespoons of jelly. In 2010, I had enough to make 4 ounces of jelly. This year, my harvest tripled, and I had enough to make a whopping 12 ounces of red currant jelly! Imagine what next year will be like…

My source for this delicious concoction is The River Cottage Preserves Handbook by Pam Corbin. Written in the UK, but translated into American, it is a must-have for anyone who wants to preserve the summer’s bounty.

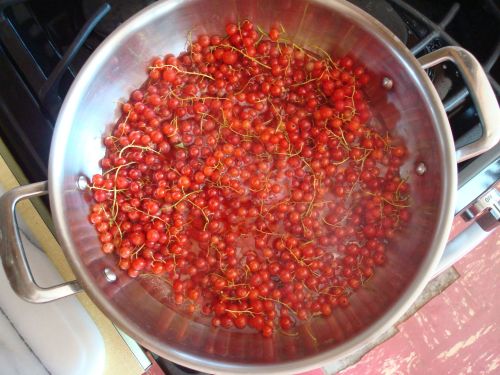
Start by washing your currants carefully. Put them in a preserving pan or any similar wide pan. I have recently learned that this helps to preserve the bright flavor of the fruit, because it allows the cooking to happen more quickly.

Add enough water to cover the currants, and cook them for 45 minutes to allow them to release their juices. Notice that you don’t have to remove the stems.

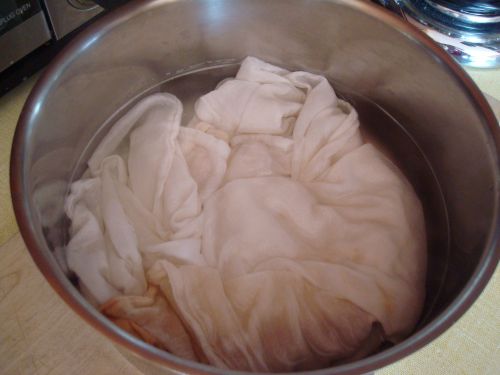
Meanwhile, get your cheesecloth ready. Boil a pan of water and immerse your cheesecloth in it until you are ready to strain your juice. Scalding the cheesecloth in boiling water kills any germs, which will help ensure that your jelly will keep for a good long time.

Now, get ready to strain your juice. Place a strainer or colander over a deep bowl. Make sure the bowl is deep enough that the colander will remain above the juice after straining. Line the colander with cheesecloth, and pour the currants and their juice in. Allow it to drain for 45 minutes or longer.

Do not be temped to squeeze every last bit of juice out of the fruit pulp. If you do, your jelly may turn out cloudy.

Measure your juice, then pour into a pan. I only had 12 ounces of juice, so I chose a small pan. Next time, I’ll choose a larger pan. Once the sugar is in and the whole thing starts boiling, it will increase dramatically in size. Choose a bigger pan than you think you’ll need. This one was really a bit too small.

Get your jars, lids, and screw caps ready. Since I was making such a small batch, I only needed two jars, but I got three ready, just in case. I put them in a pan, covered them with boiling water, and set them aside before I started boiling my jelly.

Bring the currant juice to a full boil, then add sugar. You’ll need one cup of granulated sugar for every cup of juice.

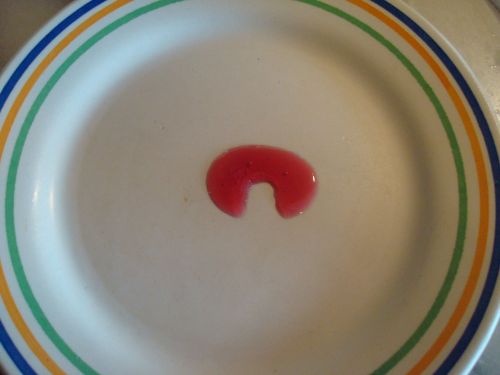
Boil for 8 minutes, then check to see if the jelly has set. My favorite way to check is the “push test.” Put a small plate in the freezer when you put the juice on to boil. When you’re ready to check for set, pull the plate out of the freezer and drop a small spoonful of the liquid onto the plate. Allow it too cool for a few seconds, then push your finger into the liquid. If the jelly flows back into the empty spot after you remove your finger, your jelly needs to boil a bit longer. If the jelly stays put, as it does in this photo, then it is ready.

Take your jars, lids, and screw caps out of the boiling water and fill. For long-term storage, you should fill them to within 1/2 inch of the top. The jar on the left will be for immediate consumption, since I didn’t have enough to fill it. Somehow, I doubt the other one will be around for very long, either…

Oxford Sausages

In the heart of the city of Oxford is the Covered Market, where you can buy everything from clothes to foods to furniture. At David John Butchers, I was amazed by the sheer variety of sausages available, every single day.

Back when I used to live in a major eastern U.S city, I could get a variety of sausages, but nothing compared to this variety. Now that I live in a village in upstate New York, my choices of sausage are breakfast or Italian. If I wanted great sausages at home, I would have to make my own.

I started with a recipe for Oxford sausages, a delicately seasoned, fine-textured sausage.

Start with very cold meat–almost frozen. The cold temperature helps suspend the fat in the sausage, which means they’ll end up wonderfully juicy.

Cut  1/2 pound of lean pork and 1/2 pound of lean veal into large chunks.

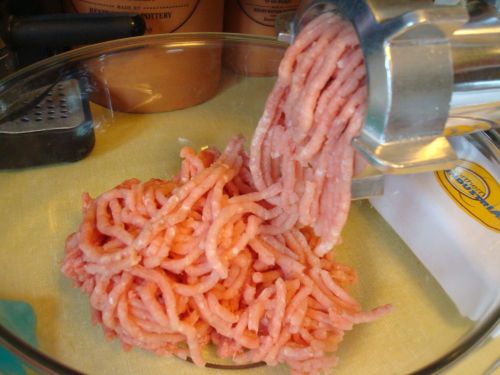
Run the chunks through your meat grinder at the fine setting into a large bowl.

Grind 6 ounces of almost-frozen pork fat on the finest setting, too. Since taking these photos, I’ve experimented with grinding the meat and fat at the same time, and it cuts down on mixing time.

Put a slice of wheat bread in a food processor, and pulse until it is all crumbs. Add to your bowl of meat and fat.

Now it’s time for the spices. In a small bowl, mix together 1 tsp salt, 1/4 tsp ground black pepper, 1/4 tsp cayenne, 1/8 tsp ground nutmeg, 1/8 tsp mace, 1/8 tsp thyme, 1/8 tsp marjoram, and 1 tsp sage. Add to your meat mixture.

For a bright note, add 1 tsp finely grated lemon zest. Add one egg, and you’re ready to mix it together. It helps if you have a heavy-duty stand mixer, but you can also mix it by hand. The key it to mix it quickly without warming it up. You want to fat to stay cold.

Before you put the sausage in casings, check the seasonings by frying up a small piece. Nothing like the wonderful scent of frying sausage

Now comes the fun part–filling the casings. The casings I use come packed in saline, but you may also find them packed in dry salt. You may wish to rinse the casings if you don’t want too much salt in your sausages.

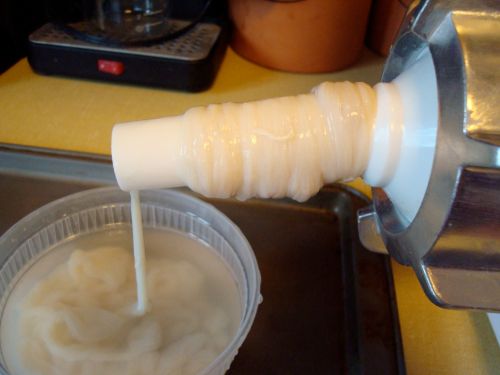
Feed the casing onto the nozzle of your meat grinder, like bunching up pantyhose before putting them on your leg. You don’t need the cutting plate in place on the grinder, just the nozzle.

Feed your sausage mixture through the grinder at a steady pace. The key is to fill the casings until they are full but not stuffed tight, so that you have enough room to twist them into links. This was my first effort at stuffing sausages, so you can see I need to work on my technique a bit!

The end result is a pleasing, delicately flavored, mildly spicy sausage. Serve this with mashed potatoes and onion gravy, and you have a fantastic meal.

Here’s the short version of the recipe.

Oxford Sausages

1/2 lb lean pork, ground on a fine setting

1/2 lb lean veal, ground on a fine setting

6 oz pork fat, ground on a fine setting

1 slice white bread, processed into crumbs

1 tsp salt

¼ tsp pepper

¼ tsp cayenne

1/8 tsp nutmeg

1/8 tsp mace

1/8 tsp thyme

1/8 tsp marjoram

1 tsp sage

1 tsp grated lemon peel

1 large egg

Combine all ingredients in bowl until well mixed.  Fry up a small amount to check spices for taste.  Adjust as needed.  Fill sausage casings.

Teacakes

An unexpected snow storm surprised me today. The view outside my window is cold and grey. It’s the perfect day for baking!

For awhile, I’ve had a hankering for teacakes, slightly sweet bread with dried fruits (such as raisins) in them. Split open, toasted, and slathered with homemade jam, they are one of the best things ever to go with a cup of afternoon tea.

Start with a pound of all-purpose flour.

Add a teaspoon of salt to the flour and stir. Then add about an ounce of butter.

A little extra butter won’t hurt anything! Now rub the butter into the flour until it is thoroughly blended in. My mother taught me to use a pastry blender, but I later learned that clean hands do a quicker job. The results are better, too, because the butter is dispersed more evenly through the flour when you use your hands. Just keep rubbing the flour and butter together until you no longer see or feel clumps of butter. Add 1 ounce of sugar, and set this bowl aside.

Next, you’ll need to proof your yeast. Add a teaspoon of sugar to 1/4 cup of warm water, then sprinkle 1/2 ounce of yeast over it. Stir well, and allow to sit until the yeast is foamy.

Don’t skip this step! It’s the only way to make sure your yeast is still potent. If you use old yeast, your teacakes won’t rise properly.

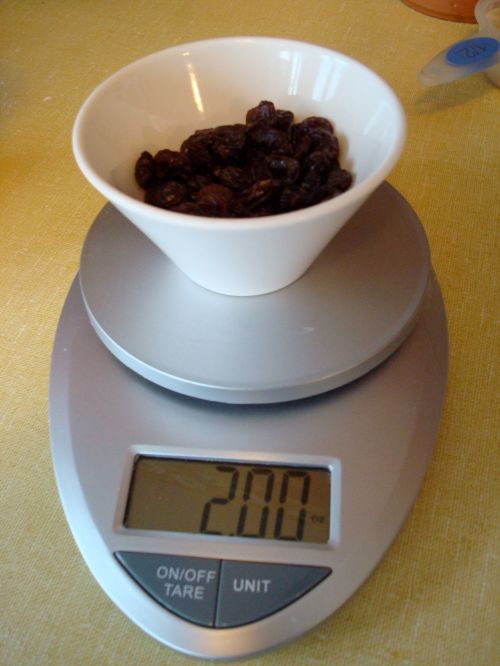
Now add 2 ounces of raisins to the flour-butter mixture and stir well.

Now, make a well in the flour-butter-raisin mixture, and pour in your yeast. Measure 10 ounces of milk in a pitcher, and slowly drizzle it into the bowl as you stir, gradually incorporating the flour into the dough as you go.

Mix until the flour is fully incorporated and you have a nice mound of dough. It will be slightly sticky.

Cover with a clean cloth and leave in a warm place to rise until doubled in size. It should take about an hour, but may be more or less depending on the warmth of your room.

Once it is doubled, it’s time for kneading. I really don’t like kneading bread, but this only takes about five minutes. I can handle five minutes.

Place your dough on a floured surface. I use a floured pastry cloth.

Knead for five minutes in order to develop a good bread texture. Then divide the dough into six balls, and flatten to about half an inch thick. You can use a rolling pin if you like, but I just flatten them with my hands. Place them on a parchment-lined baking sheet and allow to rise until doubled in height, about another hour.

Preheat your oven to 425 degrees Fahrenheit and place the rack in the middle of the oven. Bake your teacakes for 15 minutes until they are golden brown.

Allow to cool on a wire rack. Then split them in half, toast them, slather them with butter and homemade jam, and you have a wonderful afternoon treat!

Here’s the short version of the recipe:

Teacakes (makes 6)

1 lb. all-purpose flour

1 tsp. salt

1 oz. butter

1 oz. sugar

1/2 oz. dried yeast

1 tsp. granulated sugar for proofing the yeast

2 oz.  raisins (you can use other dried fruits if you choose)

10 oz. milk


1.     Mix the flour and salt in a large bowl. Rub in the butter until well incorporated. Mix in 1 ounce of sugar. Set bowl aside.

2.     In a small bowl, mix 1 tsp. sugar with 1/4 cup warm water. Sprinkle the yeast over the water; stir well. Let sit a few minutes until yeast mixture is foamy.

3.     Stir the raisins into the flour-butter-sugar mixture. Make a well in the center of the flour. Add the yeast mixture and some of the milk. Stir, gradually incorporating the flour into the mixture as you slowly add the rest of the milk. You will have a smooth, soft dough that is slightly sticky.

4.     Cover with a clean cloth and leave in a warm place until doubled in size, about an hour.

5.     Knead on a floured surface for about 5 minutes until smooth and springy. Divide into 6 balls and flatten into disks about half an inch thick. Place on a parchment-lined baking sheet.

6.     Cover with a clean cloth and allow to rise until double in height.

7.     While teacakes are rising, preheat oven to 425 degrees Fahrenheit.

8.     Bake for 15 minutes until golden brown. Cool on a wire rack.

To serve, split teacakes in half, toast them, then spread them with butter and jam.


Making pork pies

Start this recipe by making the hot water pastry dough.

First, sift together the flour and salt.

Make a well in the center, then break an egg into it.

Set this aside for a moment.

In a small pan, put the butter, lard, and water.  I get my pork locally from Brad and Heather at The Piggery, who raise heirloom breeds of pigs and produce the most delicious pork products. It’s amazing the difference between heirloom, pastured pork and industrially farm pork–absolutely worlds apart. If you’re not near The Piggery, try the pork from your local farmers market. You’ll notice a big difference!

Bring the butter and lard mixture to a boil. Then quickly work it into the flour and egg using a spoon. When it has pulled together as a dough, knead it a little to make sure everything is evenly mixed. Wrap in cling film and put in the refrigerator to chill for an hour.

You’ll have a beautiful dough that looks like this:

While the dough is chilling in the refrigerator, make the filling.

This is my new toy–a real, solid, electric meat grinder. I’d checked out the big-name brands, but ended up buying this model from Northern Tool, and I’m really pleased with it. Solidly made, not too expensive.

I’d tried grinding meat using my grandmother’s counter-mounted hand-crank grinder (the kind everyone’s grandmother or great-grandmother once used). I really didn’t like the result, because the cutting blade didn’t fit well against the grinding plate, and too much meat got caught up in the machinery, making an awful, tangled, unappetizing mess.

Then I tried my food processor. That’s a great way to get meat paste, but not a good way to grind meat.

No, if you’re going to grind your own, you need an electric meat grinder. This one is relatively fast, and the results are just beautiful. (Okay, I think this is beautiful. You may have your own definitions…)

Add the ground pork to the sausage meat, and mix well. I used my own sausage meat made for Oxford sausages, but you could use any good quality bulk sausage.

Bring the pastry out of the fridge and put on a lightly floured surface. Cut off about a third of the pastry and rewrap until later. That will be used for the tops of your pork pies.

Cut the main portion of the pastry into 6 pieces. Roll each into a circle about 4.5 to 5 inches in diameter. Make sure the pastry isn’t too thin, however. The pastry needs to be strong, since it isn’t supported by a pan or dish.

After you’ve rolled out the 6 pastry bottoms, unwrap the remaining portion of pastry and divide into 6 smaller portions. Roll each into a circle about 3-3.5 inches in diameter. These will be your pork pie tops.

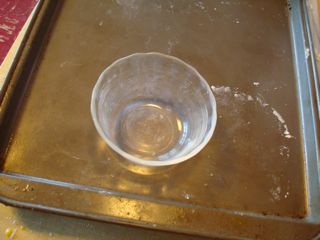
Now, to assemble the pork pies. Get a small dish, like this Pyrex custard cup.

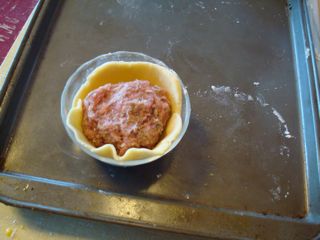
Drape a pastry bottom across the dish, making sure it is even on the sides.

Next, divide your meat mixture into 6 portions. Roll one portion into a ball and place on top of the pastry in the Pyrex dish.

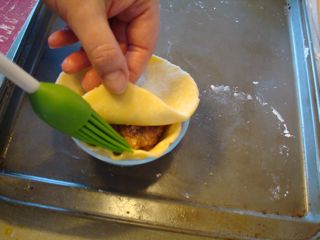
Make an egg wash with an egg yolk and a tablespoon of water. Brush along the edge of the pastry bottom, then place a pastry top over the pie.

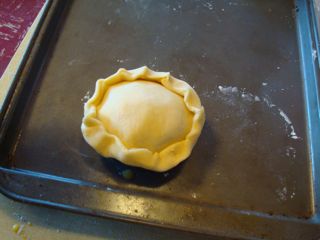
Crimp all of the edges together. It will look rustic and homemade, which is exactly as it should be. Take it out of the Pyrex dish, then brush the whole pastry top with egg wash.

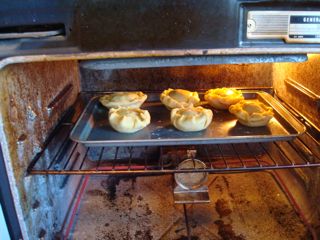
Place all six of your pork pies on a cookie sheet, and put into a 375°F oven. (Note to self: Be sure to clean your oven first, if you’re going to take pictures to show people.)

Bake for 15 minutes at 375°F, then lower the temperature to 350°F and bake for 10 more minutes, or until the internal temperature reaches 160°F.

Enjoy your pork pies warm or cold. They’re great with Branston pickle and a Guinness!

The full recipe to come shortly.

The Feed Me Better campaign coming to America?

In 2004, Jamie Oliver was shocked by the dreadful food Britain’s schoolchildren were being served every day of the school year. He wanted to change school food from bland and horrible to healthy and flavorful foods that kids would actually enjoy. He took over the kitchens at one school in Greenwich (southeast London) and launched the Feed Me Better campaign.
In early 2005, his series “Jamie’s School Dinners” spread his message and encouraged the British public and media to take a stand. More than 270,000 people signed an online petition on the Feed Me Better website, and Jamie delivered this petition to the prime minister in March 2005.  The government responded by pledging millions of pounds to improving school dinners and training school cooks. Jamie followed up with a new series, “Jamie’s Return to School Dinners,” which led the government to pledge even more money, investing a total of £650 million to improve school lunches.

Now Jamie Oliver is taking this campaign to America. He has been awarded the TED Prize, an award of $100,000 to be used to fulfill “a wish to change the world.” Jamie will reveal the details after the official award ceremony in February, but he says “it’s basically a campaign we’re working on that takes the best bits from my School Dinners and Ministry of Food campaigns here in the UK, over to the US.”

I have been hoping that he–or someone inspired by him–would do something about school lunches in this country. In the US, school food is not only horrible, but it’s the cheapest of the cheap ingredients. Just as an example, the New York Times revealed how the federal school lunch program buys ground beef from a company that processes beef with ammonia, presumably to kill pathogens, and yet tests for E. coli and salmonella have found the pathogens dozens of times in the meat intended for our children.

Take those cheap (and potentially hazardous) ingredients and add lackluster recipes, and the resulting mess is unhealthy foods that few kids want to eat. In his television programs, Jamie Oliver has shown time and time again that it’s not rocket science to prepare healthy, tasty food that people love. I hope his efforts will make a difference for our school children.

In the meantime, I’ll continue to send my kids to school with packed lunches.

The receptionist loves Branston pickle

In the early 1990s, I was living in High Wycombe, a sizeable market town in Buckinghamshire, England. I was working as a receptionist for a facilities management company, making just enough money to cover my rent on a 6-foot-by-6-foot room in a shared house, where I lived for half a year while trying to figure out what to do with the rest of my life.

The wages of a receptionist were far from luxurious. When I first started the job, I suffered through endless brown-bag lunches. Then my vivacious co-worker Gayle introduced me to the local sandwich shop, where I tried my first cheese-and-pickle bap.

To this Texas city girl, the only thing the word “pickle” conjured up was a jar full of Vlasic dill pickles. I had always been emphatically anti-pickle, but I had also learned that the best way to start learning about a new culture is to sample its food. So when Gayle bought me a cheese-and-pickle bap, I put on my best face and accepted gratefully. And I was glad I did!

First of all, English cheddar and mainstream cheddar from American grocery stores are two different entities. English cheddar is sharp and rich, with a big bold and creamy flavor, unlike mainstream American cheddar (which seemed to be either sharp–making your teeth squeak–or mild, with no flavor at all). The bap, it turned out, was a flavorful bread roll. But the pickle…. the pickle! It was some wild concoction that was sweet and spicy, tart and smooth, very complex. I couldn’t tell you what was in it, only that it was brown. And it was called Branston pickle.

Fast forward about 20 years. I can actually get Branston pickle in the specialty grocery store I visit (20 miles from my house). But the stuff costs about $5 for 8 ounces, and this stuff is so good, I couldn’t just have a little dab of it at a time. So, today, I devoted the afternoon to making my own.

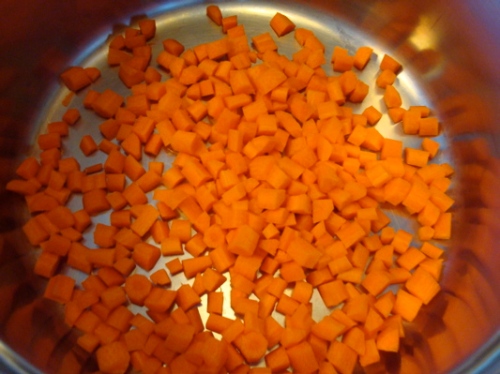
I’ll share the recipe at the end, but here are a few photos of the process. Start by dicing the carrots and putting them in a pot. Get a big pot, because this makes a lot.

Dice a medium-sized rutabaga and some garlic cloves, and add to the pot.

Add dates (yes, dates.)

Chop up half a head of cauliflower and a couple of onions, and add to the mix.

Dice two apples, two unpeeled zucchini, and 15 sweet gherkins, then add to the pot.

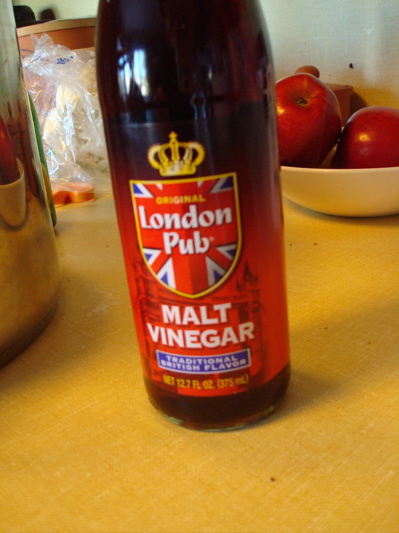
Now comes the magic–the malt vinegar. Just one whiff of this miracle elixir will take you back to England, even if you’ve never been there.

Next, add a little bit of a bunch of flavors: brown sugar, salt, lemon juice, Worcestershire sauce, mustard seeds, ground allspice, and cayenne pepper. Stir, and admire the beauty.

Simmer this pot full of loveliness for a couple of hours, until the rutabaga is crisp-tender and the whole mixture becomes a brownish color. Your whole house will smell delicious.

Then spoon the pickle into clean, sterilized Mason jars.

Now comes the hard part–waiting three weeks for the flavors to mature. I tasted this straight out of the pan, and it’s delicious. I can only imagine how wonderful this will be in three weeks.

Now, to track down some good English cheddar to go with it…

Branston Pickle Recipe makes five 16-oz. pints
This is good served alongside cold cooked meats or with a good cheddar cheese.

9 oz. carrots, peeled, diced in 1/4″ cubes
1 medium rutabaga, peeled, diced in 1/4″ cubes
4 garlic cloves, peeled, minced
4 1/2 oz. dates, finely chopped
1/2 medium cauliflower, finely chopped
2 onions, peeled, finely chopped
2 apples, peeled, finely chopped
2 unpeeled zucchini, finely chopped
15 sweet gherkins, finely chopped
8 oz. dark brown sugar
1 tsp salt
2 oz. lemon juice
12 oz. malt vinegar
1 T. Worcestershire sauce
2 tsp. mustard seeds
2 tsp. ground allspice
1 tsp. cayenne pepper
3 dashes Kitchen Bouquet browning sauce (for coloring)

1. Combine all the ingredients except the coloring in an 8-quart pot and bring to the boil.
2. Reduce the heat and simmer until the rutabaga is cooked through but still firm (about 1½ to 2 hours).
3. Add the Kitchen Bouquet until the color is dark brown.
4. Spoon into warm sterilized jars and seal.
5. Leave for at least 3 weeks to let the flavors mature.

On being an ex-pat

Since I was 18 years old, I’ve considered myself an ex-pat. After spending my first 18 years in Texas, I began a journey that took me to different parts of Europe and different parts of the United States. I’ve made homes in one place or another, only to pack it up and move it somewhere else. But I always taken a little part of each place with me when I move to the next. I think I’m rooted now, in a small village in upstate New York, thousands of miles from where I grew up and even farther away from the kinds of places I once thought I’d end up.

In every place I’ve lived, there have been marvelous foods to discover: Flautas. Chicken tikka masala. Yebeg alecha. English bangers. Cevapcici. The trouble is, the foods I took for granted in one place are expensive or hard to find in the next. So, I’ve decided to stop paying outrageous prices for imported foods and to learn how to make them myself. So, that’s what this blog is about–my attempts to recapture and make the foods I’ve loved in the many places I’ve lived.

I hope you enjoy the journey, too.